
Setting up Priyo Mail doesn’t have to be complicated. This guide walks you through every step—from incoming and outgoing server details to port numbers and security settings—so you can configure your email on smartphones, desktops, and email clients with confidence.
If you’ve recently signed up for a Priyo Mail account—or you’re helping a friend or family member get theirs working—you might be wondering how to actually *use* it beyond the web browser. That’s where understanding Priyo Mail server settings comes in. Whether you want to check your emails on your iPhone, sync them with Outlook on your laptop, or set up the Gmail app to handle your Priyo inbox, you’ll need to configure your device with the right server details.
Don’t worry—you don’t need to be a tech expert. With the correct incoming and outgoing server information, the right port numbers, and a few security settings, you’ll have your Priyo Mail working smoothly across all your devices in just minutes. This guide is designed to make that process simple, clear, and stress-free. We’ll cover everything from basic definitions to step-by-step instructions for popular platforms, plus tips to avoid common pitfalls.
Key Takeaways
- Correct server names matter: Use imap.priyo.com for incoming and smtp.priyo.com for outgoing mail to ensure reliable connections.
- Port numbers are critical: IMAP uses port 993 (SSL), while SMTP uses port 465 (SSL) or 587 (TLS)—choosing the wrong one breaks your setup.
- Enable encryption always: Always select SSL/TLS for secure data transfer and to prevent unauthorized access to your emails.
- Double-check your credentials: Your full Priyo email address and password must be entered exactly as registered—no shortcuts.
- Test after setup: Send a test email immediately to confirm both sending and receiving work properly.
- Mobile and desktop differ slightly: While core settings are the same, interface steps vary between Gmail app, Outlook, and Apple Mail.
- Troubleshooting is easy: Most issues stem from incorrect ports or disabled encryption—recheck these first if emails fail.
📑 Table of Contents
What Are Priyo Mail Server Settings?
At its core, email relies on servers—remote computers that store and send your messages. When you use Priyo Mail via a browser (like Chrome or Safari), you’re accessing your emails through Priyo’s web interface. But when you want to use an email app—like Apple Mail, Microsoft Outlook, or the Gmail app—you need to tell that app *how* to connect to Priyo’s servers. That’s what “server settings” are: the technical details that allow your device to talk to Priyo’s email system.
These settings include the server addresses (like imap.priyo.com), port numbers (such as 993 or 465), and security protocols (SSL or TLS). Without them, your email app won’t know where to look for new messages or how to send replies. Think of it like giving your app the correct mailing address, zip code, and delivery instructions so your emails arrive safely and on time.
Why Proper Configuration Matters
Using incorrect server settings is one of the most common reasons people struggle with email setup. If the port number is wrong, your emails might send but never arrive. If encryption is turned off, your login details could be exposed. And if the server name is misspelled—even by one letter—your device simply won’t connect at all.
That’s why it’s so important to follow precise instructions. The good news? Once you input the right Priyo Mail server settings, your email will sync automatically across all your devices. You’ll see the same inbox, sent items, and folders everywhere—no more logging into a browser every time you want to check your messages.
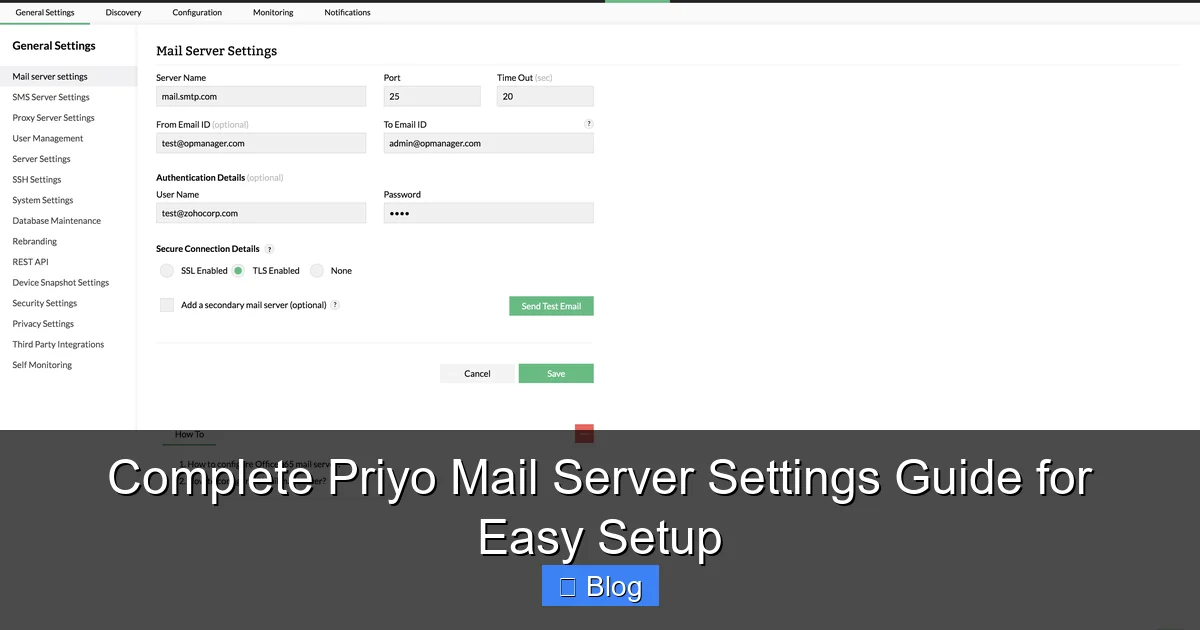
Essential Priyo Mail Server Details

Visual guide about Complete Priyo Mail Server Settings Guide for Easy Setup
Image source: opengraph.githubassets.com
Before we dive into device-specific setups, let’s lay out the core server information you’ll need. Keep this list handy—you’ll reference it repeatedly during configuration.
Incoming Mail Server (IMAP)
- Server name: imap.priyo.com
- Port: 993
- Encryption: SSL/TLS
- Username: Your full Priyo email address (e.g., [email protected])
- Password: Your Priyo account password
IMAP (Internet Message Access Protocol) is the standard for syncing emails across devices. Unlike older methods like POP3, IMAP keeps your messages on the server, so changes made on one device (like deleting or moving an email) appear everywhere else.
Outgoing Mail Server (SMTP)
- Server name: smtp.priyo.com
- Port: 465 (SSL) or 587 (TLS)
- Encryption: SSL or TLS (both are secure; use whichever your device prefers)
- Authentication required: Yes—use the same username and password as above
SMTP (Simple Mail Transfer Protocol) handles sending your emails. It’s crucial that authentication is enabled—otherwise, spammers could misuse the server. Most modern email clients will prompt you to enable this automatically, but double-check if you run into sending errors.
Important Notes
– Always use your full email address as the username—not just the part before the @ symbol.
– Never disable encryption. Even if your device suggests “None” as an option, always choose SSL or TLS.
– If one port doesn’t work (e.g., 465), try the alternative (587)—some networks block certain ports.
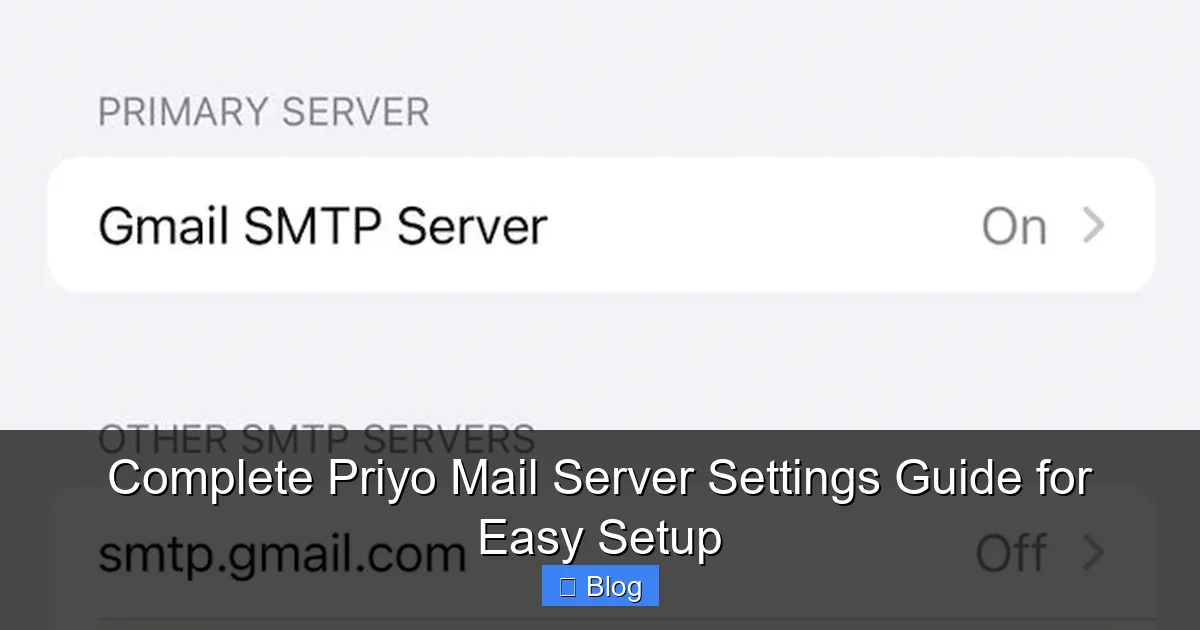
Setting Up Priyo Mail on Popular Devices
Visual guide about Complete Priyo Mail Server Settings Guide for Easy Setup
Image source: manageengine.com
Now that you have the core settings, let’s walk through how to apply them on the most common platforms. Each device has a slightly different interface, but the underlying server details remain the same.
How to Configure Priyo Mail on iPhone or iPad
1. Open **Settings** > **Mail** > **Accounts** > **Add Account** > **Other**.
2. Tap **Add Mail Account**, then enter your name, full Priyo email, password, and a description (like “Priyo Mail”).
3. Tap **Next**. The device will try to auto-configure—but it likely won’t succeed. Tap **Manual Setup** when prompted.
4. For **Incoming Mail Server**, enter:
– Host Name: imap.priyo.com
– User Name: your full email
– Password: your password
5. For **Outgoing Mail Server**, enter:
– Host Name: smtp.priyo.com
– User Name: your full email
– Password: your password
6. Tap **Next**, then ensure SSL is enabled for both servers and the correct ports are selected (993 for incoming, 465 or 587 for outgoing).
7. Tap **Save**.
Your Priyo Mail should now appear in the Mail app. Send a test email to confirm everything works.
Setting Up Priyo Mail in Microsoft Outlook (Windows/Mac)
1. Open Outlook and go to **File** > **Add Account**.
2. Enter your Priyo email address and click **Advanced Options** > **Let me set up manually**.
3. Choose **IMAP**.
4. Fill in the incoming server details:
– Server: imap.priyo.com
– Port: 993
– Encryption: SSL/TLS
5. For outgoing:
– Server: smtp.priyo.com
– Port: 465 or 587
– Encryption: SSL or TLS
6. Enter your full email and password for both.
7. Click **Next**. Outlook will test the connection—if successful, click **Done**.
Tip: If Outlook asks about “modern authentication” or MFA, you can usually skip it unless your organization requires it. Priyo Mail works fine with basic password authentication.
Using the Gmail App (Android or iOS)
The Gmail app doesn’t natively support adding non-Gmail accounts via IMAP in newer versions, but you can still do it through your phone’s built-in email app or by using the “Add another email” option carefully.
On Android:
1. Open the **Gmail app** > tap your profile icon > **Add another account** > **Other**.
2. Enter your Priyo email and password.
3. When prompted for server settings, input:
– Incoming: imap.priyo.com, port 993, SSL
– Outgoing: smtp.priyo.com, port 465 or 587, SSL/TLS
4. Complete the setup and test.
On iOS, use the native Mail app (as described above) instead—it’s more reliable for third-party accounts like Priyo.
Troubleshooting Common Priyo Mail Setup Issues
Visual guide about Complete Priyo Mail Server Settings Guide for Easy Setup
Image source: images.surferseo.art
Even with perfect settings, hiccups can happen. Here’s how to fix the most frequent problems.
“Cannot Connect to Server” Error
This usually means a typo in the server name or wrong port. Double-check:
– Is it **imap.priyo.com** (not imap.priyo.net or imap.mail.priyo.com)?
– Is the port exactly 993 for incoming and 465/587 for outgoing?
– Is SSL/TLS enabled? Never use “None.”
Also, ensure your internet connection is stable. Try switching from Wi-Fi to mobile data (or vice versa) to rule out network blocks.
Emails Send But Don’t Arrive (or Vice Versa)
If you can receive but not send, the issue is almost always the SMTP settings. Confirm:
– Authentication is enabled for the outgoing server.
– You’re using port 465 or 587—not 25 (which is often blocked).
– Your password hasn’t expired or been changed recently.
If you can send but not receive, focus on the IMAP settings—especially the port and encryption.
Password Keeps Getting Rejected
First, reset your Priyo Mail password via the web interface to ensure it’s correct. Then, when setting up, make sure you’re entering the *full email address* as the username—not just “yourname.” Some devices default to the local part only, which won’t work.
Also, avoid special characters in passwords if possible—some older email clients struggle with symbols like @ or !.
Emails Sync Slowly or Not at All
This is often a device-specific sync setting. On iPhone, go to **Settings** > **Mail** > **Accounts** > **Fetch New Data** and ensure “Push” is enabled or set to fetch frequently. On Android, check the account sync settings in **Settings** > **Accounts**.
Security Best Practices for Priyo Mail
Your email contains personal information—so protecting it is essential. Here’s how to stay safe while using Priyo Mail.
Always Use Encryption
SSL (Secure Sockets Layer) and TLS (Transport Layer Security) encrypt the data between your device and Priyo’s servers. This prevents hackers from intercepting your login details or reading your emails in transit. Always select SSL or TLS—never leave it disabled “for faster speed.”
Enable Two-Factor Authentication (If Available)
While Priyo Mail may not offer built-in 2FA, consider using a strong, unique password and changing it every few months. Avoid reusing passwords from other sites.
Keep Your Devices Updated
Operating system and app updates often include security patches. An outdated email client might not support modern encryption standards, making your connection vulnerable.
Beware of Phishing Attempts
Priyo will never ask for your password via email. If you receive a message claiming to be from Priyo support asking for login details, delete it immediately—it’s a scam.
Final Tips for a Smooth Experience
– **Write down your settings:** Keep a secure note with your server details, ports, and passwords for future reference.
– **Test immediately:** After setup, send yourself a test email and reply to it. This confirms both sending and receiving work.
– **Use the same settings everywhere:** Whether on your phone, tablet, or computer, the Priyo Mail server settings are identical—no need to customize per device.
– **Contact support if stuck:** If you’ve triple-checked everything and still can’t connect, reach out to Priyo’s customer support with your exact error message.
With these steps, you’ll have your Priyo Mail working seamlessly across all your devices—no frustration, no guesswork.
Frequently Asked Questions
What are the correct Priyo Mail server settings for IMAP?
The incoming server is imap.priyo.com, using port 993 with SSL/TLS encryption. Your username must be your full email address, and authentication is required.
Can I use Priyo Mail with Outlook or Apple Mail?
Yes! Both Outlook and Apple Mail support IMAP and SMTP. Use smtp.priyo.com for outgoing mail on port 465 (SSL) or 587 (TLS), and enable authentication.
Why won’t my Priyo Mail send emails even though I entered the right password?
This is usually due to incorrect SMTP settings—especially the port or encryption. Ensure you’re using port 465 or 587 with SSL/TLS, and that authentication is turned on.
Do I need to use my full email address as the username?
Absolutely. Unlike some older systems, Priyo Mail requires your complete email (e.g., [email protected]) as the username for both incoming and outgoing servers.
Is it safe to store my Priyo Mail password in my email app?
Yes, as long as your device is password-protected and you use encryption (SSL/TLS). Modern email apps store passwords securely using your device’s built-in keychain or credential manager.
What should I do if I keep getting a “connection failed” error?
First, verify the server names and ports. Then check your internet connection and ensure SSL/TLS is enabled. If problems persist, try removing and re-adding the account with fresh settings.
Leave a Reply