
Moving your email from Gmail to Priyo Mail doesn’t have to be stressful. This guide walks you through every step—from backing up your data to setting up your new inbox—so you can switch smoothly and securely.
Key Takeaways
- Backup your Gmail data first: Always export your emails, contacts, and calendar before starting the migration to avoid losing important information.
- Priyo Mail offers strong privacy features: Unlike Gmail, Priyo Mail doesn’t scan your emails for ads, giving you better control over your data.
- Use IMAP for seamless email transfer: Connect your Gmail account to Priyo Mail using IMAP settings to sync emails automatically.
- Update your email client settings: After migration, reconfigure your email apps (like Outlook or mobile apps) to work with your new Priyo Mail account.
- Notify contacts of your new address: Let friends, colleagues, and clients know you’ve switched to avoid missed messages.
- Test everything after setup: Send test emails and check folders to ensure all data transferred correctly.
- Enjoy a cleaner, ad-free inbox: Priyo Mail focuses on simplicity and speed, making email management easier and more enjoyable.
📑 Table of Contents
Why Switch from Gmail to Priyo Mail?
Let’s be honest—Gmail has been a reliable email service for years. It’s fast, widely used, and integrates well with Google’s ecosystem. But as privacy concerns grow and digital clutter increases, many users are looking for alternatives. That’s where Priyo Mail comes in. Designed with simplicity, security, and user control in mind, Priyo Mail offers a refreshing change from the ad-driven, data-mining model of Gmail.
Unlike Gmail, which scans your emails to serve personalized ads, Priyo Mail respects your privacy. Your messages stay yours—no tracking, no profiling, no hidden algorithms deciding what you see. Plus, the interface is clean and intuitive, making it easier to focus on what matters: your communication. Whether you’re a professional managing client emails or someone who just wants a clutter-free inbox, Priyo Mail delivers a smoother, more respectful email experience.
What You Need Before Starting the Migration
Before you begin moving your emails from Gmail to Priyo Mail, it’s important to prepare. Rushing into the process without planning can lead to lost data or incomplete transfers. Take a few minutes to gather what you need and set yourself up for success.

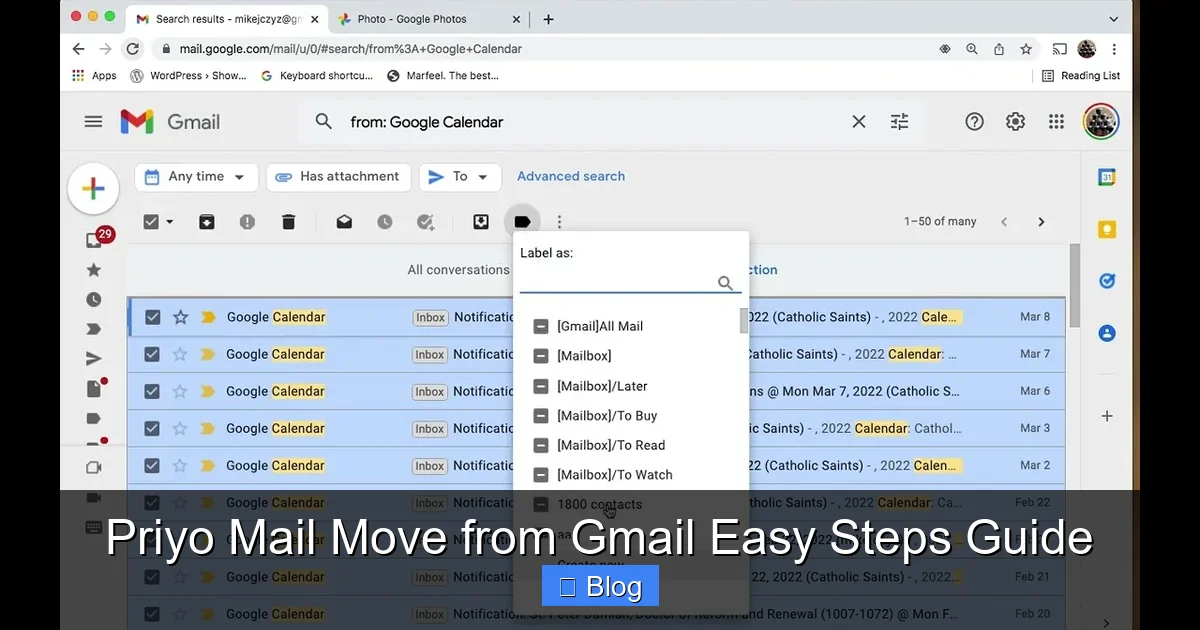
Visual guide about Priyo Mail Move from Gmail Easy Steps Guide
Image source: esrp5wss3st.exactdn.com
Create a Priyo Mail Account
First things first—you’ll need a Priyo Mail account. Visit the official Priyo Mail website and sign up using your preferred email address. You can choose a custom domain if you have one, or use a standard Priyo Mail address. The signup process is quick and straightforward, requiring just a few details like your name and a secure password.
Enable IMAP in Gmail
To transfer your emails, you’ll need to enable IMAP (Internet Message Access Protocol) in your Gmail settings. Here’s how:
- Log in to your Gmail account.
- Click the gear icon in the top-right corner and select “See all settings.”
- Go to the “Forwarding and POP/IMAP” tab.
- Under “IMAP access,” select “Enable IMAP.”
- Click “Save Changes” at the bottom.
This step allows Priyo Mail to access and sync your Gmail messages. Without IMAP enabled, the migration won’t work.
Gather Your Login Details
Make sure you have your Gmail login credentials (email and password) handy. You’ll also need your Priyo Mail login info. If you use two-factor authentication on Gmail, consider using an app password instead of your regular password for the migration process. This adds a layer of security and prevents login issues.
Step-by-Step Guide to Move Emails from Gmail to Priyo Mail
Now that you’re prepared, it’s time to move your emails. The process is simpler than you might think, especially if you follow these clear steps. We’ll walk you through connecting your accounts, syncing your data, and verifying the transfer.
Visual guide about Priyo Mail Move from Gmail Easy Steps Guide
Image source: i.ytimg.com
Step 1: Add Your Gmail Account to Priyo Mail
Log in to your Priyo Mail account and navigate to the settings or account management section. Look for an option like “Add Email Account” or “Import Emails.” Select Gmail from the list of providers. You’ll be prompted to enter your Gmail address and password.
Priyo Mail will use IMAP to connect to your Gmail account. This means it will pull in your emails, folders, and labels without deleting anything from Gmail. Your original messages stay safe in your Gmail inbox—this is just a copy for your new account.
Step 2: Choose What to Import
Once connected, Priyo Mail will ask which folders or labels you want to import. You can choose to bring over everything—Inbox, Sent, Drafts, Spam, and custom labels—or select only the ones you need. For most users, importing the Inbox and Sent folders is a good start.
If you have a lot of emails, the initial sync might take some time. Be patient—larger mailboxes can take several hours or even a day to fully transfer. Priyo Mail will usually show a progress bar so you can track how much has been imported.
Step 3: Sync Contacts and Calendar (Optional)
While emails are the main focus, you might also want to move your contacts and calendar events. Priyo Mail supports importing Google Contacts and Calendar data, but this often requires a separate process.
To import contacts:
- In Gmail, go to Google Contacts and click “Export.”
- Choose the vCard (.vcf) format and download the file.
- In Priyo Mail, go to the Contacts section and look for “Import.”
- Upload the .vcf file to transfer your contacts.
For calendar events, export your Google Calendar as an .ics file and import it into Priyo Mail’s calendar tool. This ensures your appointments and reminders come with you.
Setting Up Your Email Clients and Apps
After your emails are in Priyo Mail, you’ll want to make sure your email apps—like Outlook, Apple Mail, or your phone’s default mail app—are set up to work with your new account. This step ensures you can send and receive emails from any device.
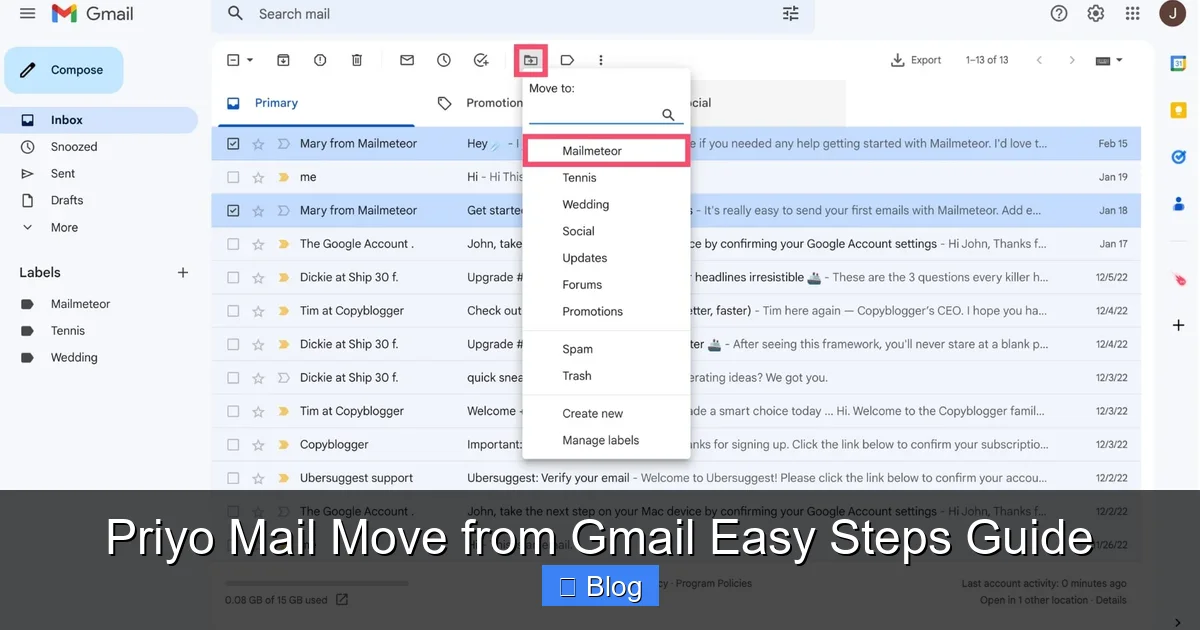
Visual guide about Priyo Mail Move from Gmail Easy Steps Guide
Image source: assets.mailmeteor.com
Configure IMAP Settings for Priyo Mail
Each email client uses specific server settings to connect to your mailbox. For Priyo Mail, you’ll typically need the following IMAP and SMTP details:
- Incoming Mail Server (IMAP): imap.priyomail.com
- Port: 993
- Security: SSL/TLS
- Outgoing Mail Server (SMTP): smtp.priyomail.com
- Port: 465 or 587
- Security: SSL/TLS or STARTTLS
Enter these settings in your email app when adding a new account. Use your full Priyo Mail email address and password. If you’re unsure where to find these settings, check the help section of your email client or Priyo Mail’s support page.
Test Sending and Receiving
Once configured, send a test email to a friend or another account. Then, ask them to reply. This confirms that both sending and receiving are working properly. Also, check that your folders (like Sent, Drafts, and custom labels) appear correctly in your app.
If something isn’t working, double-check your server settings and password. Sometimes, enabling “Less secure app access” in Gmail (if you’re still using it for forwarding) or using an app-specific password can resolve login issues.
Tips for a Smooth Transition
Migrating email isn’t just about moving data—it’s about adapting to a new system. Here are some practical tips to make the switch easier and more effective.
Start with a Trial Period
Don’t delete your Gmail account right away. Use both accounts side by side for a week or two. This gives you time to get comfortable with Priyo Mail and ensures nothing important gets lost. You can set up email forwarding from Gmail to Priyo Mail during this period so you don’t miss any new messages.
Organize Your New Inbox
Priyo Mail may import your Gmail labels as folders. Take some time to rename or reorganize them to fit your preferences. You can also create new folders and filters to automatically sort incoming emails. For example, set up a filter to move all emails from your boss into a “Work” folder.
Update Your Signature and Auto-Reply
If you use an email signature or vacation auto-reply in Gmail, recreate them in Priyo Mail. This keeps your professional appearance consistent. Most email services let you customize signatures with logos, links, and formatting—take advantage of that.
Notify Important Contacts
Let your coworkers, clients, and close contacts know about your new email address. Send a brief message like: “Hi! I’ve switched to a new email provider. Please update your records—my new address is [[email protected]].” This reduces the chance of missed communications.
Common Challenges and How to Fix Them
Even with careful planning, you might run into a few hiccups during the migration. Here are some common issues and quick fixes.
Emails Not Syncing
If your emails aren’t appearing in Priyo Mail, check that IMAP is enabled in Gmail and that you’ve entered the correct server settings. Also, ensure your internet connection is stable. Large mailboxes may take time—wait a few hours and refresh.
Login Errors
If you’re getting login errors, double-check your password. If you use two-factor authentication, generate an app password in your Google Account settings and use that instead of your regular password.
Missing Folders or Labels
Some custom labels in Gmail may not transfer perfectly. After migration, manually recreate any missing folders in Priyo Mail and move the relevant emails over. You can also use search filters to find and organize them.
Slow Performance
If Priyo Mail feels slow after importing thousands of emails, try archiving old messages. Keep only the most recent emails in your main folders and move older ones to an “Archive” folder. This speeds up loading times.
Why Priyo Mail Is Worth the Switch
Switching email providers might seem like a hassle, but the benefits of Priyo Mail make it worthwhile. You’re not just changing an app—you’re choosing a better way to communicate.
With Priyo Mail, you get a fast, ad-free inbox that respects your privacy. No more targeted ads based on your personal conversations. No more feeling like your data is being mined for profit. Instead, you get a clean, focused interface that helps you stay organized and productive.
Plus, Priyo Mail is built for simplicity. Whether you’re managing work emails, personal messages, or newsletters, everything is easy to find and manage. The migration process is straightforward, and once you’re set up, you’ll wonder why you didn’t switch sooner.
Final Thoughts
Moving from Gmail to Priyo Mail is a smart choice for anyone who values privacy, simplicity, and control over their digital life. While the process requires a bit of setup, it’s well worth the effort. By following this guide, you can transfer your emails smoothly, keep your data secure, and enjoy a better email experience.
Remember to back up your data, enable IMAP, and test everything after migration. Take your time, stay organized, and don’t hesitate to reach out to Priyo Mail’s support team if you need help. In no time, you’ll be enjoying a cleaner, faster, and more private inbox.
Frequently Asked Questions
Can I keep using Gmail after switching to Priyo Mail?
Yes, you can keep your Gmail account active even after migrating to Priyo Mail. Many users keep Gmail for specific services (like Google Drive or YouTube) while using Priyo Mail for daily email.
Will my Gmail emails be deleted during the migration?
No, your emails remain in Gmail unless you manually delete them. The migration only copies your messages to Priyo Mail using IMAP, so your original data stays safe.
How long does it take to transfer emails from Gmail to Priyo Mail?
The time depends on how many emails you have. Small accounts may sync in minutes, while large mailboxes with thousands of messages can take several hours or a day.
Can I import my Google Calendar and Contacts to Priyo Mail?
Yes, you can export your Google Calendar as an .ics file and your contacts as a .vcf file, then import them into Priyo Mail’s calendar and contacts sections.
Do I need technical skills to move from Gmail to Priyo Mail?
No, the process is designed to be user-friendly. As long as you can follow step-by-step instructions and enter server settings, you can complete the migration without technical expertise.
Is Priyo Mail free to use?
Priyo Mail offers both free and paid plans. The free version includes basic email features, while premium plans offer additional storage, custom domains, and advanced security options.
Leave a Reply