
Setting up Priyo Mail on your iPhone is simple and fast when you follow the right steps. This guide walks you through manual and automatic configuration, ensuring your emails sync smoothly with your device.
Key Takeaways
- Automatic setup is easiest: Use the built-in iPhone mail app with your Priyo Mail credentials for quick configuration.
- Manual setup gives more control: Enter server settings like IMAP and SMTP manually if auto-setup fails.
- Use correct server details: Ensure incoming (IMAP) and outgoing (SMTP) server addresses are accurate to avoid errors.
- Enable SSL for security: Always use SSL encryption to protect your email data during transmission.
- Check password and username: Double-check your login details to prevent authentication issues.
- Update iOS regularly: Keep your iPhone updated to ensure compatibility with email services like Priyo Mail.
- Troubleshoot common issues: Learn how to fix sync problems, login errors, and missing emails.
📑 Table of Contents
Why Use Priyo Mail on Your iPhone?
If you’re a Priyo Mail user, accessing your emails on the go is essential—especially when you’re using an iPhone. Whether you’re managing personal messages, staying on top of work communications, or simply want all your emails in one place, setting up Priyo Mail on your iPhone ensures you never miss an important update. The good news? It’s easier than you might think.
Priyo Mail is a popular email service, especially in regions like Bangladesh, known for its reliability and user-friendly interface. With millions of users relying on it daily, having seamless access across devices is a must. Your iPhone, with its intuitive Mail app, makes it simple to integrate Priyo Mail into your daily routine. Once configured, you’ll enjoy real-time syncing, push notifications, and the ability to manage multiple accounts from a single inbox.
But how exactly do you get started? Don’t worry—this guide will walk you through every step, whether you prefer the quick automatic setup or need to go the manual route. We’ll also cover common pitfalls and how to fix them, so you can enjoy a smooth, hassle-free email experience.
Before You Begin: What You’ll Need
Visual guide about How to Set Up Priyo Mail Email on iPhone Easily
Image source: cdsassets.apple.com
Before diving into the setup process, it’s important to gather all the necessary information. Having these details ready will save you time and prevent frustration down the line.
First, make sure you have your Priyo Mail login credentials handy. This includes your full email address (like [email protected]) and your password. If you’ve forgotten your password, reset it through the Priyo Mail website before proceeding.
Next, ensure your iPhone is connected to a stable Wi-Fi or cellular network. A weak connection can interrupt the setup process or cause errors. Also, check that your iPhone is running the latest version of iOS. Apple frequently updates its Mail app, and older versions may not support certain features or security protocols used by Priyo Mail.
Finally, have your iPhone’s Mail app open and ready. The Mail app comes pre-installed on all iPhones, so you won’t need to download anything extra. Just tap the Mail icon on your home screen or swipe through your apps to find it.
Double-Check Your Credentials
It might sound obvious, but entering the wrong email or password is one of the most common reasons setup fails. Make sure there are no typos—especially in the domain part (e.g., @priyo.com). Also, if your password includes special characters, ensure they’re entered correctly. If you’re unsure, log in to your Priyo Mail account via a web browser first to confirm everything works.
Ensure Your iPhone Is Updated
To check your iOS version, go to Settings > General > Software Update. If an update is available, install it. Updated software ensures better compatibility with email providers and improves security. Plus, newer iOS versions often include bug fixes that resolve email sync issues.
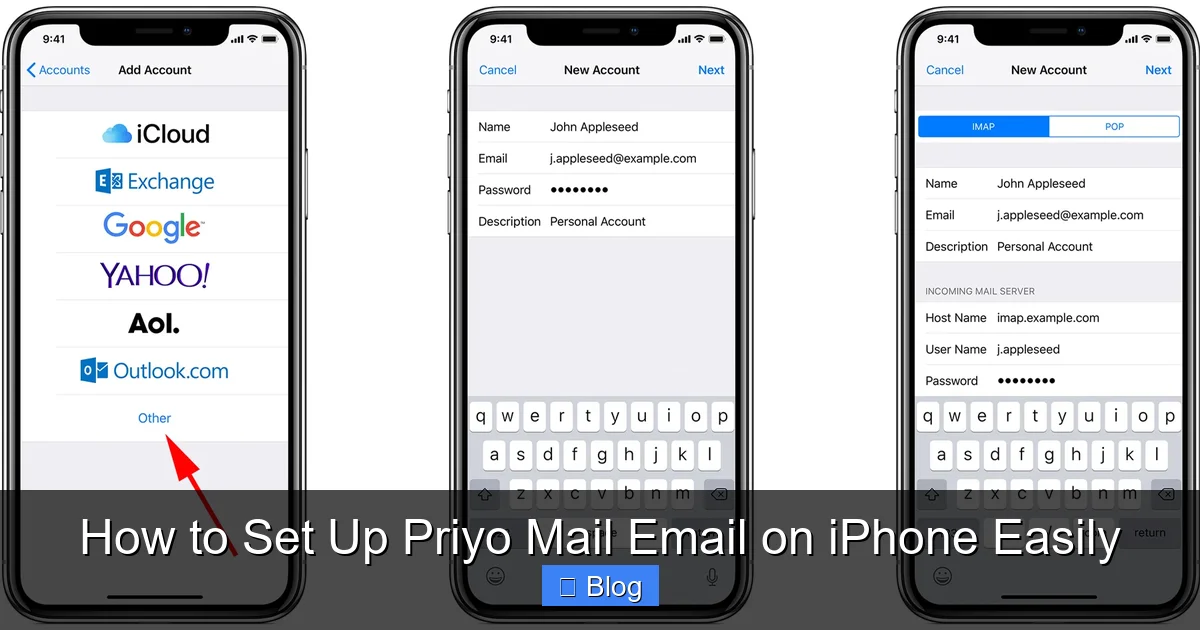
Method 1: Automatic Setup Using iPhone Mail App
Visual guide about How to Set Up Priyo Mail Email on iPhone Easily
Image source: images.macworld.co.uk
The easiest way to set up Priyo Mail on your iPhone is through the automatic configuration feature in the Mail app. This method uses Apple’s built-in detection system to find the correct server settings based on your email address.
Here’s how to do it:
1. Open the **Settings** app on your iPhone.
2. Scroll down and tap **Mail** (or **Passwords & Accounts** on older iOS versions).
3. Tap **Add Account**.
4. Select **Other** from the list of email providers.
5. Tap **Add Mail Account**.
6. Enter your name, full Priyo Mail email address, password, and a description (like “Priyo Mail”).
7. Tap **Next**.
At this point, your iPhone will attempt to automatically configure the account by looking up the server settings. If successful, you’ll see a confirmation screen. Tap **Save**, and your Priyo Mail account will appear in the Mail app.
What If Auto-Setup Fails?
Sometimes, automatic setup doesn’t work—especially if Priyo Mail isn’t in Apple’s default provider list. Don’t panic. This just means you’ll need to enter the server details manually, which we’ll cover in the next section. But first, try double-checking your email and password. Also, ensure you’re connected to the internet. If the issue persists, move on to manual setup.
Tips for a Smooth Auto-Setup
– Use a strong Wi-Fi connection to avoid timeouts.
– Make sure your email address is entered exactly as it appears (case-sensitive in some cases).
– If prompted, allow the Mail app to access your account information.
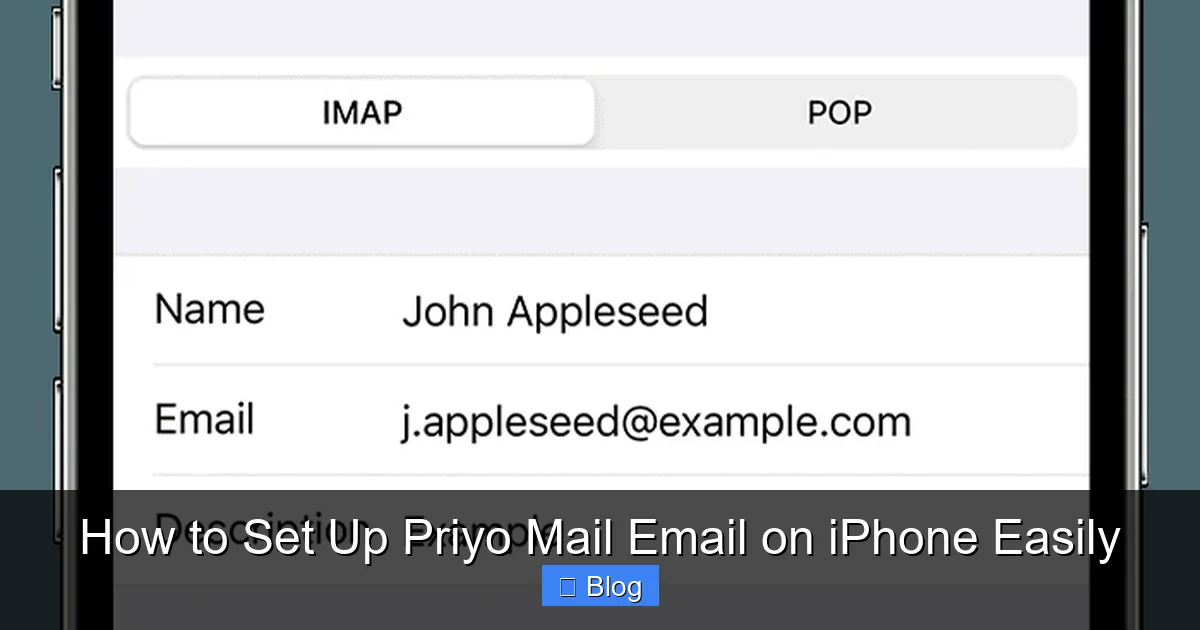
Method 2: Manual Setup for Priyo Mail on iPhone
Visual guide about How to Set Up Priyo Mail Email on iPhone Easily
Image source: cdsassets.apple.com
If automatic setup doesn’t work, manual configuration is your best bet. This method gives you full control over the incoming and outgoing server settings, ensuring a successful connection.
Follow these steps:
1. Open **Settings** > **Mail** > **Add Account** > **Other** > **Add Mail Account**.
2. Enter your name, email address, password, and description.
3. Tap **Next**, then select **IMAP** (recommended) or **POP** (less common).
4. You’ll now see fields for incoming and outgoing mail server settings.
Incoming Mail Server (IMAP)
– **Host Name:** imap.priyo.com
– **User Name:** Your full email address (e.g., [email protected])
– **Password:** Your Priyo Mail password
– **Port:** 993
– **Security:** SSL/TLS
Outgoing Mail Server (SMTP)
– **Host Name:** smtp.priyo.com
– **User Name:** Your full email address
– **Password:** Your Priyo Mail password
– **Port:** 465 or 587
– **Security:** SSL/TLS
After entering these details, tap **Next**. Your iPhone will verify the settings. If everything is correct, you’ll see a success message. Tap **Save**, and your account will be added.
Why Use IMAP Over POP?
IMAP (Internet Message Access Protocol) is recommended because it syncs your emails across all devices. When you read, delete, or move an email on your iPhone, the change reflects on your computer and other devices. POP, on the other hand, downloads emails to one device and often deletes them from the server, which can lead to data loss if not managed carefully.
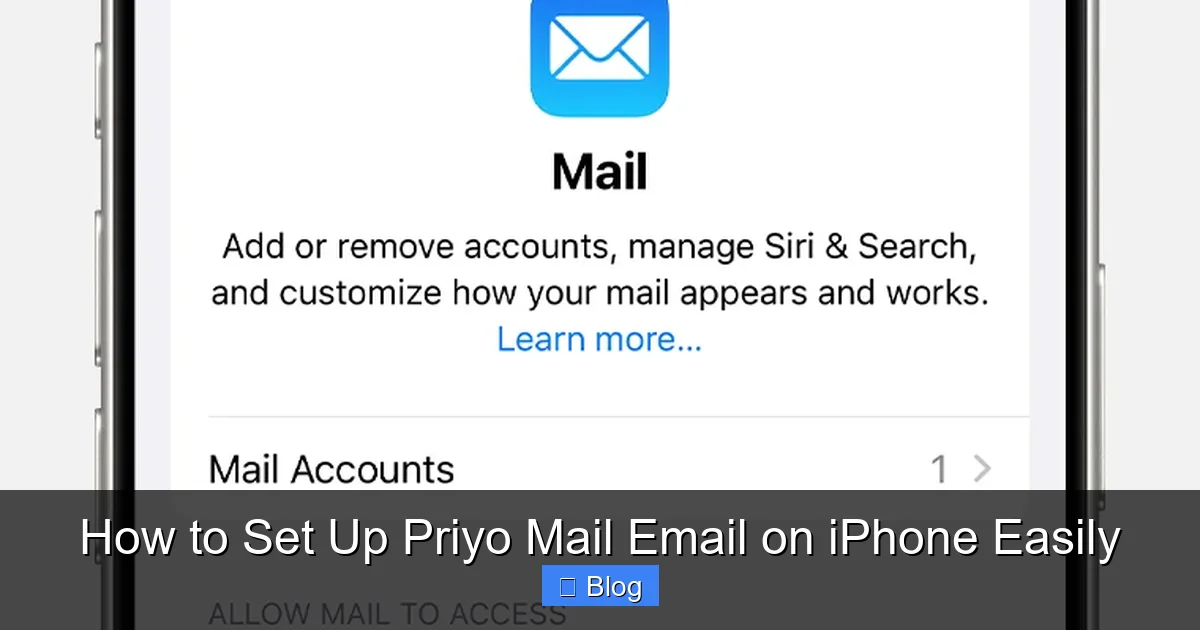
Configuring Email Sync and Notifications
Once your Priyo Mail account is set up, you’ll want to customize how it behaves on your iPhone. This includes how often it checks for new emails, whether it sends push notifications, and which folders sync.
To adjust these settings:
1. Go to **Settings** > **Mail** > **Accounts**.
2. Tap your Priyo Mail account.
3. Tap **Account** again to view advanced options.
Mail Days to Sync
By default, your iPhone may only sync emails from the last week or month. To change this:
– Tap **Mail Days to Sync**.
– Choose from options like 1 day, 3 days, 1 week, 2 weeks, 1 month, or no limit.
If you receive a lot of emails, selecting “no limit” ensures you don’t miss older messages. However, this may use more storage and data.
Push vs. Fetch
Your iPhone can receive emails in two ways: **Push** and **Fetch**.
– **Push** delivers emails instantly when they arrive on the server. This is ideal for time-sensitive messages but uses more battery.
– **Fetch** checks for new emails at set intervals (e.g., every 15 minutes). It’s more battery-friendly but less immediate.
To enable Push (if supported):
– Go to **Settings** > **Mail** > **Accounts** > **Fetch New Data**.
– Toggle **Push** on.
– Select your Priyo Mail account and choose **Push**.
If Push isn’t available, set Fetch to a shorter interval like 15 or 30 minutes.
Notification Settings
To get alerts when new emails arrive:
1. Go to **Settings** > **Notifications** > **Mail**.
2. Tap your Priyo Mail account.
3. Enable **Allow Notifications**.
4. Choose alert style (banner, alert, or none), sound, and whether to show previews.
You can also customize notifications per account, so your Priyo Mail alerts don’t interfere with other email accounts.
Troubleshooting Common Issues
Even with careful setup, you might run into problems. Here are some common issues and how to fix them.
“Cannot Verify Server Identity” Error
This error usually appears when SSL settings are incorrect or outdated. To fix it:
– Ensure you’re using the correct server addresses (imap.priyo.com and smtp.priyo.com).
– Confirm SSL is enabled and the correct ports are used (993 for IMAP, 465 or 587 for SMTP).
– Update your iPhone to the latest iOS version.
If the problem persists, temporarily disable SSL (not recommended for security) to test the connection, then re-enable it with correct settings.
Emails Not Syncing or Delayed
If emails aren’t appearing or are delayed:
– Check your internet connection.
– Go to **Settings** > **Mail** > **Accounts** > **Fetch New Data** and ensure Fetch is enabled.
– Manually refresh the Mail app by pulling down on the inbox.
– Restart your iPhone to reset network connections.
Login Failed or Authentication Error
This usually means your username or password is incorrect. Double-check both. If you’ve changed your password recently, update it in the Mail settings. Also, ensure your account isn’t locked due to multiple failed login attempts.
Outgoing Mail (SMTP) Not Working
If you can receive emails but can’t send them:
– Verify the SMTP server (smtp.priyo.com) and port (465 or 587).
– Ensure SSL is enabled.
– Check that your outgoing server requires authentication (it should).
– Try sending a test email after making changes.
Tips for a Better Priyo Mail Experience on iPhone
Now that your account is set up, here are some tips to make the most of it:
– **Use VIPs:** Mark important contacts as VIPs so their emails appear in a special folder and trigger notifications.
– **Organize with Folders:** Create custom mailboxes to sort emails by project, sender, or topic.
– **Enable Dark Mode:** Go to **Settings** > **Display & Brightness** > **Dark** for easier nighttime reading.
– **Use Siri Shortcuts:** Create voice commands like “Check my Priyo Mail” for hands-free access.
– **Backup Regularly:** Use iCloud or iTunes to back up your iPhone, including email settings.
Conclusion
Setting up Priyo Mail on your iPhone doesn’t have to be complicated. Whether you use the automatic setup for convenience or go manual for full control, you can have your emails syncing in just a few minutes. With the right server settings, security protocols, and sync preferences, you’ll enjoy a fast, reliable, and secure email experience on your iPhone.
Remember to keep your iOS updated, double-check your login details, and use IMAP with SSL for the best results. And if you run into issues, the troubleshooting tips in this guide will help you get back on track quickly.
Now that you’re all set, you can focus on what matters—staying connected, productive, and informed, no matter where you are. Happy emailing!
Frequently Asked Questions
Can I set up multiple Priyo Mail accounts on my iPhone?
Yes, you can add multiple Priyo Mail accounts to your iPhone. Simply repeat the setup process for each account under Settings > Mail > Add Account. Each will appear separately in the Mail app.
Why can’t I send emails from my Priyo Mail account on iPhone?
This is usually due to incorrect SMTP settings. Verify that the outgoing server is smtp.priyo.com, port 465 or 587, and SSL is enabled. Also, ensure your password is correct.
Does Priyo Mail support push notifications on iPhone?
Yes, if configured correctly. Go to Settings > Mail > Fetch New Data and enable Push for your Priyo Mail account. Note that not all email providers support Push, but Priyo Mail typically does with proper IMAP settings.
How do I delete my Priyo Mail account from my iPhone?
Go to Settings > Mail > Accounts, tap your Priyo Mail account, then tap Delete Account. Confirm to remove it. This only removes the account from your iPhone—it doesn’t delete your actual Priyo Mail account.
Can I use Priyo Mail with third-party apps like Outlook?
Yes, you can set up Priyo Mail in apps like Microsoft Outlook for iOS using the same IMAP/SMTP settings. Just enter your email, password, and server details when prompted.
Is my Priyo Mail data secure on iPhone?
Yes, especially when using SSL encryption. Always ensure SSL is enabled in your account settings to protect your emails from being intercepted during transmission.
Leave a Reply